Intro to Assembly
I've always wanted to learn Assembly, the low-level programming language. I taught myself to code when I was fairly young, which made me a bit of a lone wolf when I was a kid. I didn't have any other friends who were into programming or computer science. I had friends who had built their own PCs, and a few friends who got their A+ certification near the end of high school, but that was the extent of their involvement in the computer world.
Sometimes, when I could get my friends to talk about programming or computer science, the assembly language would come up. There was this mystique around it and how difficult it is to learn. I assumed they were right and I never really tried. Then, some years later, after I graduated college, I decided to try. I remember looking for a good book, and all I could find was some academic version of Assembly that some professor had come up with. I didn't want to learn some academic version of Assembly; I wanted to learn the real thing.
Fast forward to 2025, and now you can ask Gemini or any frontier model to teach you real Assembly. So that's what we're going to do here. We'll only get as far as writing a "hello world" program.
For the purpose of this tutorial, you will need to be on Microsoft Windows 11 and you'll need to install Windows Subsystem for Linux (WSL).
Setting up WSL
Follow these steps on Windows 11 to install WSL:
- Right-click on the Start menu and select "Windows PowerShell (Admin)" or "Command Prompt (Admin)".
- Type the following command and press enter:
wsl --install
- Once it is finished, restart your computer.
- When the restart finishes, you should see a Linux terminal window appear asking you to create a Unix username and password.
From here on out, when you want to enter the WSL environment, open up a PowerShell or Command Prompt and type wsl and press enter.
Basics
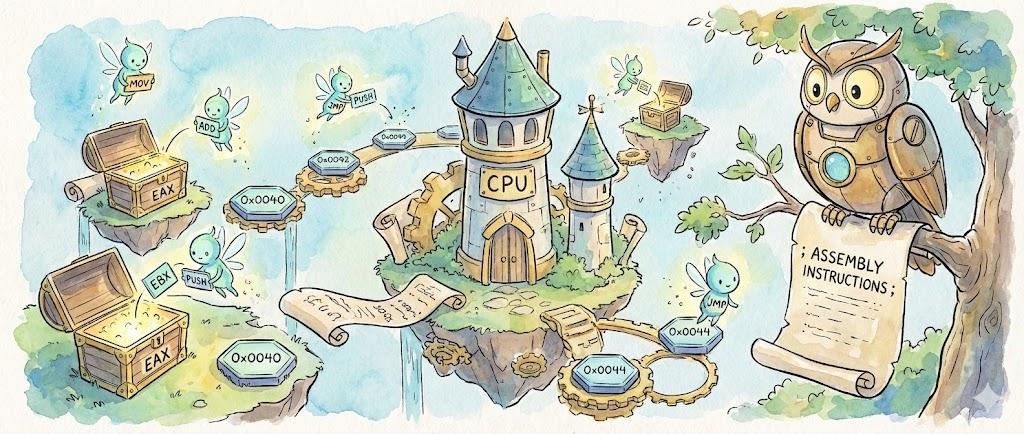
Gemini offered me a quite useful mental model to think about how Assembly works.
- The CPU (The Brain): It does the thinking.
- Registers (The Hands): The CPU cannot work directly on data sitting in RAM (the warehouse). It must first pick that data up and hold it in its "hands." These hands are called Registers.
- Registers are tiny, incredibly fast storage slots directly inside the CPU.
- In modern 64-bit processors (x86-64), these have names like rax, rbx, rcx, etc.
- The Stack: A scratchpad area in memory for temporary notes (variables).
- Instructions: The verbs. Assembly is a list of imperative commands: "Move this here," "Add these two," "Jump to that line."
In my previous half-hearted attempts to learn Assembly, I read about registers but they seemed kind of redundant and pointless. What I was missing is the fact that the CPU cannot work directly on data sitting in the random access memory (RAM). The CPU must first fetch data from the RAM and store it in a register, and operate on it there.
You'll have to decide how you want to manage your files. Your WSL environment is just a bootable .vhdx image sitting C:\Users<username>\AppData\Local\wsl\{nnnn-nnnn-nnnn-nnnn-nnnn}\ext4.vhdx
This means when you've booted into WSL, you've booted into this image, and there is a virtual hard drive inside that file where your WSL files are stored. You can store your files in that virtual hard drive, or you can reach your Windows filesystem by pathing to the C mount, like so:
cd /mnt/c
Because I like being able to use a full Windows IDE (e.g., VSCode or Google Antigravity), I have chosen to store my files in /mnt/c/Users/<username>/Documents/Dev/
I recommend doing the same so you can use a full Windows IDE. But the choice is yours. Either way, create a directory for your project and navigate to it.
Our First Program
Create a new file called hello.asm and paste the following code into it:
section .data
    ; Define our data.
    ; db = define byte (creates raw bytes in memory)
    ; 0xA is the hex code for a newline character
    message db "Hello, World!", 0xA
    length  equ $-message          ; Calculate string length automatically

section .text
    global _start                  ; Must declare where the code starts for the linker

_start:
    ; --- STEP 1: PRINT THE MESSAGE ---
    ; To do this, we use a "System Call" (syscall).
    ; We put specific numbers in specific registers so the OS knows what to do.

    mov rax, 1          ; The syscall ID for 'sys_write' is 1
    mov rdi, 1          ; File descriptor 1 is 'stdout' (standard output)
    mov rsi, message    ; Put the address of our message into rsi
    mov rdx, length     ; Put the length of the message into rdx
    syscall             ; Trigger the OS to read these registers and act

    ; --- STEP 2: EXIT THE PROGRAM ---
    ; If we don't exit cleanly, the program will crash (segfault)
    ; after running the previous lines.

    mov rax, 60         ; The syscall ID for 'sys_exit' is 60
    mov rdi, 0          ; The exit code (0 means success)
    syscall             ; Trigger the OS
Make sure to save.
To understand the code above, it is useful to know the anatomy of an Assembly instruction:
Most x86 Assembly instructions follow this syntax: COMMAND [DESTINATION], [SOURCE] Examples:
- mov rax, 50 -> "Move the number 50 into the rax register."
- add rax, rbx -> "Add the value in rbx to the value in rax, and store the result in rax."
- jmp loop_start -> "Jump to the label named loop_start."
Now we need to run the code. We will need three steps:
- Assemble the code: turn hello.asm into an object file (hello.l)
- Link the object file: turn hello.o into an executable file (hello)
- Run the executable
First, we will need to install NASM (Netwide Assembler). Issue the following command inside WSL:
sudo apt update
sudo apt install nasm build-essential
Next, we will need to assemble the code. Issue the following command inside WSL:
nasm -f elf64 hello.asm -o hello.o
Next, link it:
ld hello.o -o hello
Finally, run it:
./hello
You should see it print "Hello, World!" to the terminal.
Hello, World!
Congratulations on building your first Assembly program!
Explaining the Code
So what exactly did we just do? Well, let's step through the code line by line.
First, it is useful to know about the Applicaton Binary Interface (ABI). This is a strict contract that defines how a program should interact with the OS. For the purposes of this tutorial, we are using System V AMD64 ABI, which is the standard ABI for 64-bit Linux.
Now, let's dive into the code.
section .data
    message db "Hello from the registers!", 0xA
    len equ $-message
section .data tells the operating system (OS) to define a piece of memory to read and write from, but not to execute from.
message db "Hello from the registers!", 0xA assigns a string of bytes to a memory location called message. db means "define byte".
0xA is a hex code for a newline character.
len equ $-message is a bit tricky, and I'll admit I don't fully understand it yet, but $ is a special symbol that represents the current position in memory, equ means "equal", 0xA is the hexadecimal code for a newline character, and $-message means "subtract the address of message from the current position in memory". The result of subtracting the address of message from the current position in memory is the length of the string. There is something more interesting happening here that I want to maybe cover in a future post.
section .text
    global _start
section .text tells the OS to define a piece of memory to read or execute from, but not write to.
global _start tells the OS where the code starts. This is equivalent to main() in C++.
_start:
    mov rax, 1
mov rax, 1 puts the number 1 into the rax register. rax is the Accumulator Register, and it is used to store the result of an operation. This tells the Kernel that we want to call the sys_write function. If we had put a 2 in the rax register, we would tell the Kernel that we want to call the sys_open function.
mov rdi, 1
mov rdi, 1 puts the number 1 into the rdi register. The ABI states that the first argument (Argument 1) for any system call (syscall) must go in rdi. This is important because sys_write requires 3 arguments: sys_write(int file_descriptor, const char *buffer, size_t count)
There's different values we could have put into rdi:
- 0 = Standard Input (stdin)
- 1 = Standard Output (stdout)
- 2 = Standard Error (stderr)
As you can see, it makes sense that we put 1 into rdi because we want to write to stdout.
mov rsi, message
The ABI states that the second argument (Argument 2) for any system call (syscall) must go in rsi. As we saw above, the second argument for sys_write is an address pointing to the message we want to write.
mov rdx, len
The ABI states that the third argument (Argument 3) must go in rdx. As we saw above, the third argument for sys_write is the length of the message we want to write.
syscall
syscall is a special instruction that triggers the OS to read the registers and act. Or in simpler terms, it says "do it, do the thing".
Gemini offered a more detailed explanation of what syscall really does:
- The CPU pauses your program.
- It switches from User Mode (Ring 3) to Kernel Mode (Ring 0).
- The Kernel wakes up, looks at rax to see what you want (Write).
- It looks at rdi, rsi, and rdx to get the details.
- It prints to the screen.
- It returns control to your program (back to Ring 3).
This whole business about User Mode, Kernel Mode, Ring 0, and Ring 3 requires a bit more explanation, so I'll consider covering that topic in a future post.
mov rax, 60
This line puts the number 60 into the rax register. Putting a 60 in this register tells the OS that we want to call the sys_exit function.
    mov rdi, 0
    syscall
Next, we move the value 0 into the rdi register to tell the operating system that we want to exit with a code of 0. This means we exited successfully. If we exited with a code of 1, it would mean we exited with an error. Finally, as before, syscall triggers the OS to read the registers and act.
That sums up our line-by-line explanation of the code. I hope this helps you understand some of the basics of Assembly!
And now, I leave you with a lovely image that Gemini created to illustrate a memory address map for the "Hello" portion of the string we used in our program.
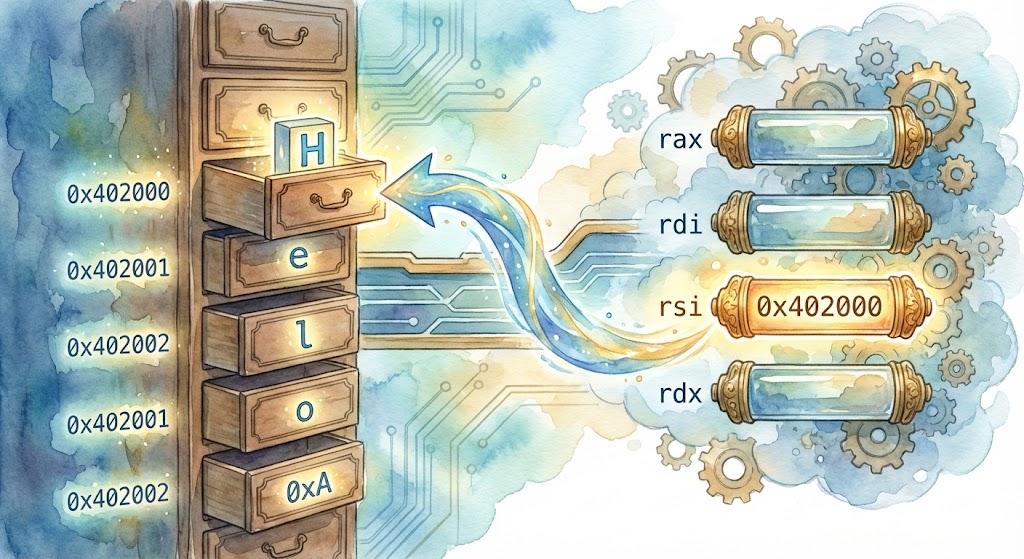
-Kairos Anamnesis
Comments? Send me an email! kairosanamnesis@gmail.com